Log and RAW workflows
The professional video industry's #1 source for news, trends and product and tech information. Sign up below.
You are now subscribed
Your newsletter sign-up was successful
A new trend in camcorders is their ability to record data from several on-board codecs. For example, take AVC-Intra and AVC-Ultra. The announced Cinema Camera from Blackmagic (BMCC) carries this trend further by supporting two compressed codecs — ProRes 422HQ and DNxHD — plus uncompressed RAW. ProRes, in turn, can be had with either of two gamma curves applied: REC709 (the standard gamma for HD recordings) and logarithmic (“FILM” mode). Figure 1 shows the BMCC’s recording options.

Figure 1. BMCC compression options
Post-production workflows for these advanced cameras will be more complex than those for ENG/EFP camcorders using traditional compression systems. These workflows require specialized knowledge and can be time consuming. This article will present a brief overview of log and RAW workflows.
DeBayered — REC709 — Compressed
Figure 2 shows a schematic illustrating the data-flow within a BMCC. The right path shows its 15.81mm x 8.88mm (1.78:1) CMOS sensor whose 12-bit serial-RGB signal is deBayered with scaling from 2432 x 1366 photocites to a 1920 x 1080 HD frame. REC709 gamma is applied to this 4:2:2 Y’CrCb signal that is then compressed by a ProRes 422HQ or DNxHD (220Mb/s) codec. The encoded 10-bit data are recorded to an SSD.
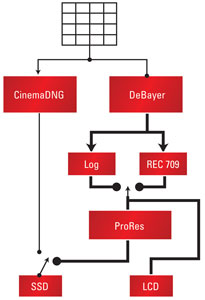
Figure 2. BMCC data-flow schematic
Because recordings are standard ProRes or DNxHD, they can be edited as would any other compressed format. They require no special post workflow.
The professional video industry's #1 source for news, trends and product and tech information. Sign up below.
DeBayered — Log — Compressed
Again referencing Figure 2, the right path shows that the serial-RGB signal from the 12-bit sensor is deBayered to 1920 x 1080 pixels. Logarithmic gamma is then applied to this 4:2:2 Y’CrCb signal that is then compressed by a 10-bit ProRes codec. The 10-bit ProRes encoded data, carrying slightly less dynamic range than the 13-stops claimed to be carried by the camera’s RAW data, are recorded by an SSD.
Log ProRes is imported into your NLE the same way REC709 ProRes is imported. Begin by appending footage into a timeline. The log difference is seen when viewing a clip either from a source Event or in a Timeline. As shown in Figure 3, a frame from log ProRes appears washed-out. (Image courtesy of the Diamond Brothers.)
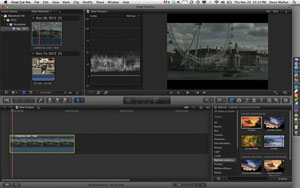
Figure 3. A log curve, which results in a washed out image
To restore contrast, software such as FXFactory sold by Noise Industries is employed. Drag the Curves function from the Natress Levels and Curves collection onto a clip.
As shown by Figure 4, you first set Log Mode to “Log to Video then Curves.” With this setting, log ProRes is mapped into video space so contrast is restored. You have a choice of the floating-point mapping function to use. Set Log to Video Curve to one of three curves: Log Cineon To Video (LogC); Log B To Video; and Log A To Video. Each creates a subtly different look. I prefer using Log A, although others may prefer Log C.
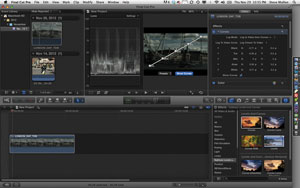
Figure 4. A linear curve with five nodes
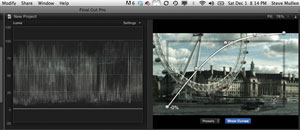
Figure 5. A linear curve with five nodes on top of a visible frame
A curve with five nodes appears superimposed over the visible frame. (See Figure 5.) These nodes appear in the waveform monitor as five luma peaks. One disregards them when looking at the signal.
Figure 5 displays the image that is the result of pushing the right-most nodes higher thereby compensating for the underexposed shot.
The final step is to click the Show Curves button to disappear the superimposed curve. You can now proceed with editing the footage.
RAW — Uncompressed
The left path presented in Figure 2 shows the 2.5K 12-bit CMOS sensor feeding logic that wraps the serial-RGB raw signal as CinemaDNG data. Captures are made at 23.98p, 24p, 25p, 29.97p and 30p. These uncompressed 12-bit data are recorded to an SSD.
Several applications can handle RAW footage. These include: DiVinci Resolve (from Blackmagic); Speedgrade for Premiere CS6; and Adobe After Effect’s (AE) RAW importer. I used After Effects for this article.
After launching AE, go to Preferences and choose Import>Sequence Footage. Set the Frame Rate appropriately. Click OK.
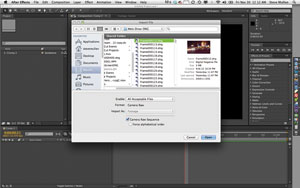
Figure 6. The Files>Import File command window
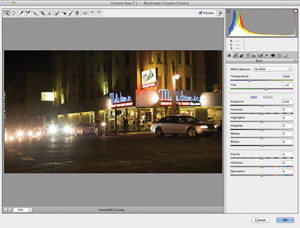
Figure 7. A panel with white balance controls
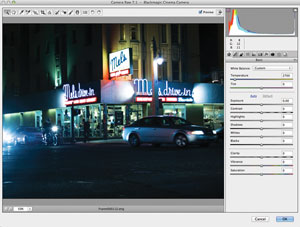
Figure 8. White balance dialed down to to 2700 degrees
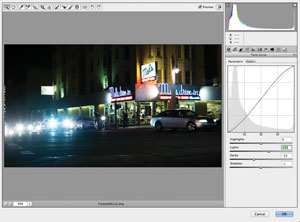
Figure 9. An S-curve applied to a RAW frame
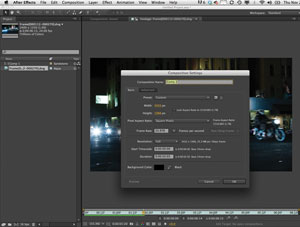
Figure 10. The setting of a new composition command
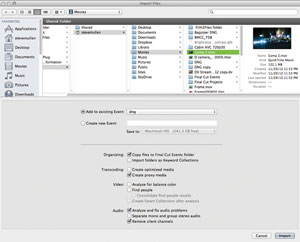
Figure 11. An FCP X import dialog box
Now set the Files>Project Settings. Set Depth to “16bpc” which defines the project to have RGB channels with each channel utilizing 16-bits. Click OK.
Then, issue the Files>Import File… command. (See Figure 6.) Now browse to a folder of DNG frames. Select the lowest number frame and confirm Format is Camera Raw. Also, confirm Camera Raw Sequence is checked. Click Open to import the clip and auto-open the Camera RAW window. The frame will be deBayered to create an RGB image.
On page 12, Figure 7 shows the control panel with white balance controls that are by default set to “As Shot.” This footage, courtesy Marco Solorio (©2012, OneRiver Media), looks perfect — too perfect for use in a noir production. Figure 8 shows the scene with the Custom color temperature dialed down to 2700 degrees.
Next, a slight S-curve is applied to deepen shadows and add punch to the highlights. This is done with another panel. (See Figure 9.) When finished grading the RAW frame, click OK to make all frames in a clip share the same settings. This type of adjustment is called a “one-light” grade.
Next, issue the Composition>New Composition command. Set Preset to “Custom” and dial in 2432px and 1366px. Now, set the Frame Rate to 23.976 and click OK. (See Figure 10.)
Double click the clip so you can see it in the Viewer. Issue the Composition>Add to Render Queue command. Set the Output Module to “Custom: ProRes 4444.” Doing so defines a conversion of 12-bit RAW frames using floating path math to 16-bit values that are exported as ProRes with 4:4:4 color sampling. Lastly, render the composition. It will take some time to deBayer each frame.
Now launch your NLE. Figure 11 shows the import dialog box for FCP X. By creating a proxy (ProRes) file at import, editing will be done using this performance-oriented file.
During export, ProRes 4444 source files are written to disk. (Effects and composites must, of course, be decompressed — from ProRes 4444 — to RGB floating point. These segments will be compressed to ProRes 4444 during export.)
While pre-processing RAW isn’t difficult, it is very time consuming. Working with log ProRes is far faster because the deBayering is done in-camera rather than in software on a computer.
—Steve Mullen is the owner of DVC. He can be reached via his website at http://home.mindspring.com/~d-v-c.
