Incident or Reflected: Using a Light Meter

Jay Holben
In the days of old, back when television was solely recorded on a thing called “film,” the cinematographer was known as a kind of fortune-teller/ magician who could mysteriously read the light in the air and know exactly how the image would end up on the screen. Instead of a magic wand, or a crystal ball, the cinematographer’s best friend in this sorcery was their light meter.
With the advent of video cameras and, later, digital video cameras, this magical ability to predict the photochemical future went by the wayside as one could actually see the final image on a monitor in real time. This has led to a generation of camera people who believe that you never need a light meter and, worse, have no idea how to use one when they discover that they do need it.

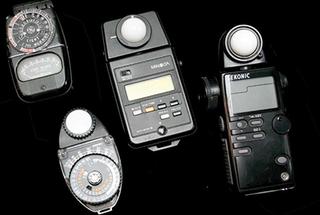
A variety of light meters
PROPER EXPOSURE
A light meter acts on the fundamental principle of “proper” exposure, which—as the meter knows it—is middle gray, also known as 18-percent reflectance or Zone V. This middle gray is the “sweet spot” for all photographic mediums and is (more or less) the point at which light is recorded exactly as it is to the eye.
The light meter assumes that everything you are photographing is an 18-percent gray surface and will tell you at which aperture you need to expose your subject to render it medium gray. That may seem odd, but it works quite well, as I’ll explain in a moment.
The light meter requires some information: your shutter angle and frame rate (combined; your shutter speed) and your camera’s sensitivity (ISO, ASA, EI). The meter then utilizes a photosensitive cell to measure the intensity of the light and reports a given aperture at which to “properly” expose the scene. From there, it is the cinematographer’s creative input that determines how that information will be used.
There are two main types of light meters: incident and reflected.
INCIDENT LIGHT METER
An incident light meter measures the amount of light falling onto it. The meter becomes a substitute for the subject being photographed and can measure the light directly from the source. These are the meters with a white disc or white half ping-pong ball on them. The ball is intended to represent the curvature of the human face.
The simplest method of using an incident meter is to place the meter at the subject’s position and to point the ball at the camera lens. All of the light sources that hit your talent’s face will hit the ball and the meter will average out those intensities to give you “proper” exposure. An alternative method, and primarily preferred by most cinematographers, is to point the meter directly at each light source, measure each independently and then decide how to expose the scene.
When taking a measurement, the meter assumes the object you are photographing is a perfect 18-percent gray surface. In reality, you’ll very rarely ever be photographing a perfect 18-percent gray surface, but the beauty of an incident meter is that it will give you the proper exposure for nearly any item you are photographing.
Let’s assume you are, indeed, photographing an 18-percent gray wall. You have 550 footcandles of light falling on the wall, which reflects back only 18 percent of that light or 100 footlamberts. (Footcandles is the measurement of incident light falling on a subject; footlamberts is the measurement of reflected light bouncing off a subject.) The meter reads the light falling onto the wall and tells you at a 100 ISO at 1/48 shutter speed you need to expose the wall at an f/2.8 to render it medium gray.
Now, let’s assume that you’re photographing a black wall under the same circumstances. The meter will still tell you to expose an f/2.8, but the black wall will only reflect 2 percent of the light falling on it, only 11 footlamberts. Shooting at an f/2.8 will underexpose the wall considerably (by about three stops) and, as a result, the wall will appear black. Inversely, if you have a white wall, the incident meter will still tell you f/2.8, but now 95 percent of the light is reflected back so you have 520 footlamberts entering the camera lens and, as a result, the wall will be overexposed— by about two stops—and will be represented as a white wall on the final image.

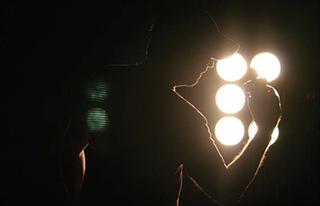
Author takes a reading of 9-Light PAR with a Sekonic L-508c.
SPOT METER
A reflected, or spot, meter is just the opposite. You look through a spot meter, like a small camera viewfinder (in fact the built-in meters inside cameras are reflected light meters), and it reads the light bouncing off of or reflecting off of a subject. This means the reading is, of course, biased by the actual color and reflectivity of the subject. The spot meter, like the incident meter, assumes you are photographing a medium gray wall—and that’s where things get tricky.
Using the same scenario from above, if you have 550 footcandles falling on a gray wall and 100 footlamberts reflected off (18 percent), the spot meter reads the 100 footlamberts, compares that to 100 ISO and 1/48 second shutter speed and tells you to expose at an f/2.8. That gives you a perfect representation of that gray wall. But when you have a black wall and the spot meter reads only 11 footlamberts reflected off, since the meter assumes the wall is 18 percent gray, and not black, it will tell you how to expose that wall as gray and tell you to expose at f/1. If you follow the meter’s instructions the black wall will be “properly” exposed (according to the meter) and the wall will now appear medium gray in the final result.
If you have the opposite situation, with a white wall, the meter will read the 520 footlamberts reflecting off and tell you to expose at an f/5.6, which will render that white wall—you guessed it—medium gray.
This doesn’t mean that a spot meter doesn’t work, it merely requires the user to interpret the information the meter provides. There are, however, many applications where a spot meter shines, namely in measuring a light source itself such as a practical lamp shape that is seen in the shot or a stained-glass window, where an incident meter won’t work. Also, if you’re at a distance to your subject and can’t get to them, perhaps they’re wildlife or you’re on a crane, a spot meter can be used from the camera position.
Together, they’re incredibly useful tools. Where a meter really shines is in recording light ratios, something you can’t do with just a monitor. If you have to return to a location at a later date and match a look, measuring your lighting ratios beforehand can save you a lot of trouble in recreating that look.
In addition, one of the most challenging lighting situations for any cinematographer is shooting a daytime exterior when you have to shoot for many hours and make it only look like a few minutes in the final result. As you constantly adjust your lighting for the moving sun and/or variable cloud coverage, you need to add fill or take away hard light. The light meter becomes your best friend for keeping the balance quickly and efficiently.
Jay Holben is the technical editor of Digital Video and a contributor to Government Video. He is also the author of the book “A Shot in the Dark: A Creative DIY Guide to Digital Video Lighting on (Almost) No Budget.”
Get the TV Tech Newsletter
The professional video industry's #1 source for news, trends and product and tech information. Sign up below.
